Wednesday, February 3, 2016

Camp Blanket for Winter Camp

We recently made a run to the east side of the state chasing coyotes and exploring in the snow.  Winter camping is my favorite - no bugs, few people, and the weather is already bad so you can't get too disappointed.  Besides, after the 1st day, you acclimate and don't notice it anyway.

Usually we skip the tent and sleep on the ground.  If it is too wet or windy, we'll hit the truck canopy.  This last trip we did both.


Which leads into this latest project - the bedroll.  I've been wanting one of these for years - something light and simple enough to keep the snow and especially the wind out, while not being too big of a deal to setup quickly.

The basics: heavy canvas, with a liner of Tyvek (for waterproofing) and one of those cheap, foil "emergency" blankets that never work very well.
 

The canvas is folded like an envelop, and open on one side to slide in your bag.
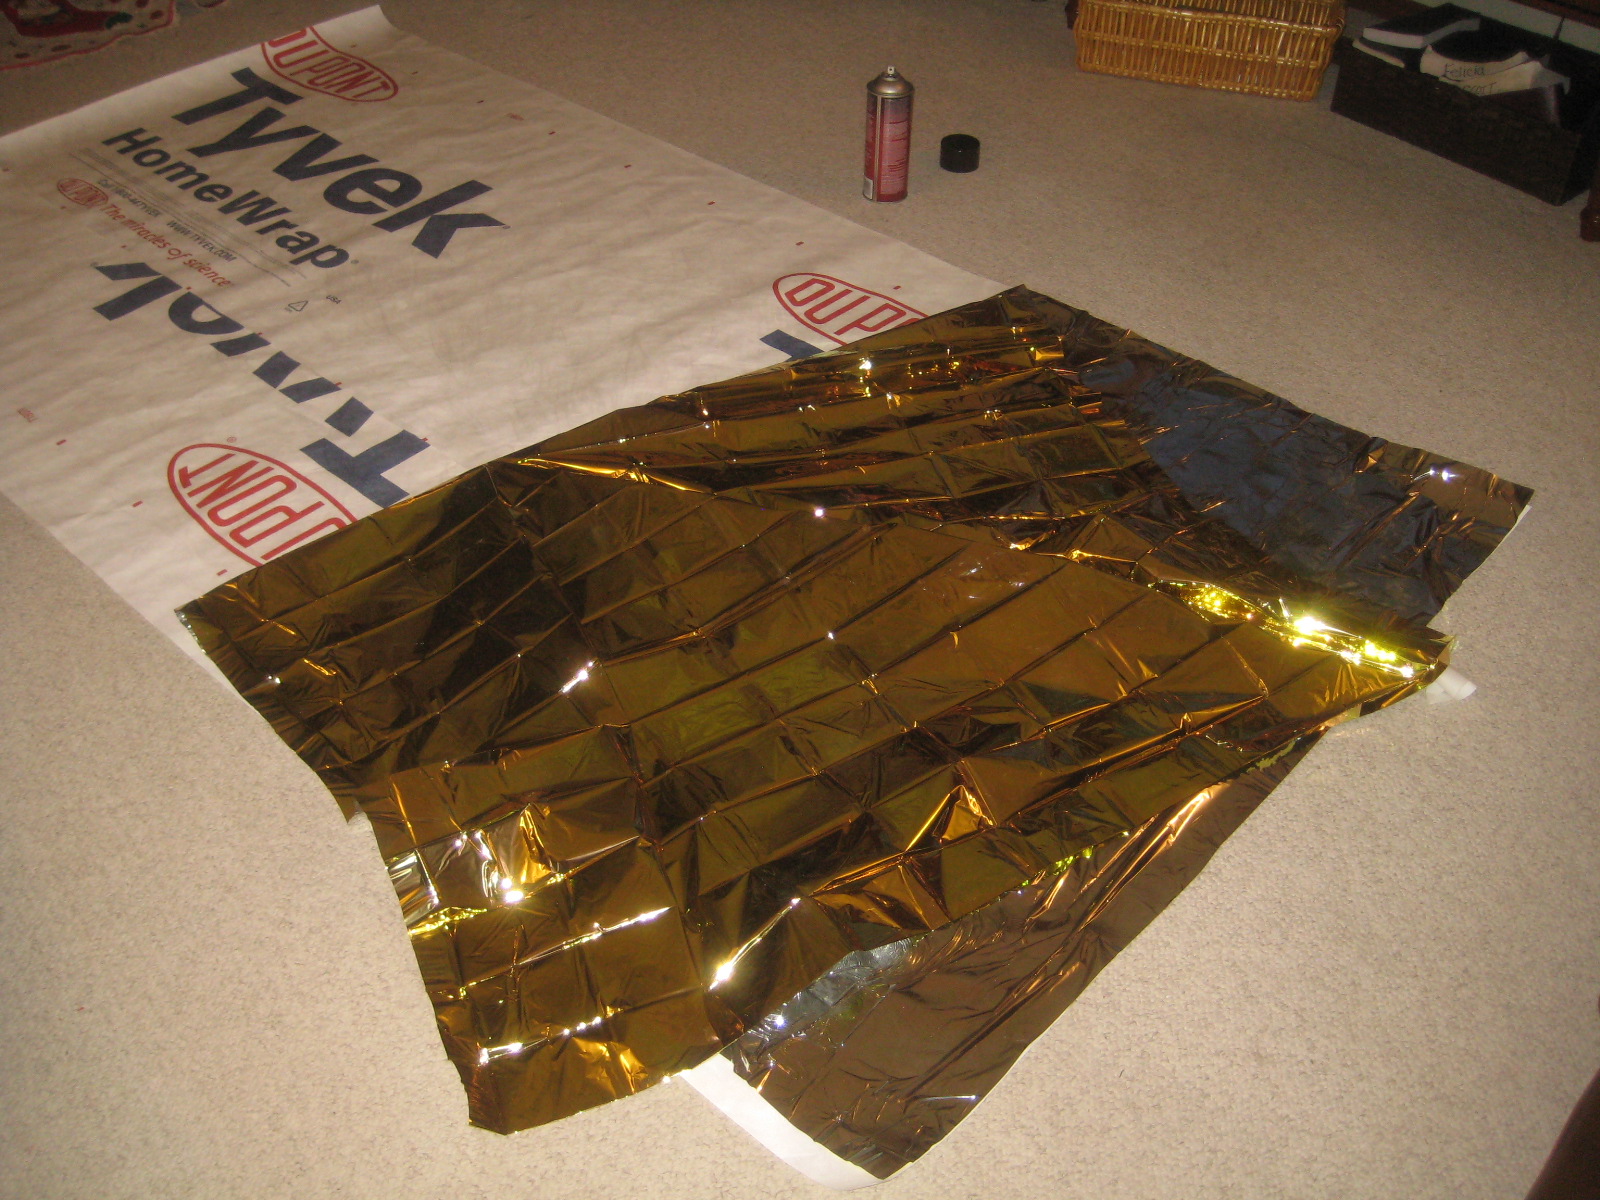


The tyvek is laminated to the space blanket using strong, double-sided tape at the corners and a spray adhesive to the blanket.  Easy and works GREAT!


The canvas works awesome to keep the wind from biting through the sleeping bag, and the tyvek/blanket helps keep the heat loss through the ground pad down.

Of course we did some thermal testing too - and the tyvek/space blankie did noticeably well at heat loss redux through the canvas.


Can't wait to get out and use it in the field.

The whole bundle weighs about 6 lbs - too much for a backpack trip, but not bad for winter truck camping over a week.  Setup time is < 30 seconds, making it the clear winner over tent setup.

Our First Hydro-Dipping

So, we've gotten some film for our printer to print some patterns for hydro-dipping some projects... but we saw this technique on FaceTube, and had to try it.

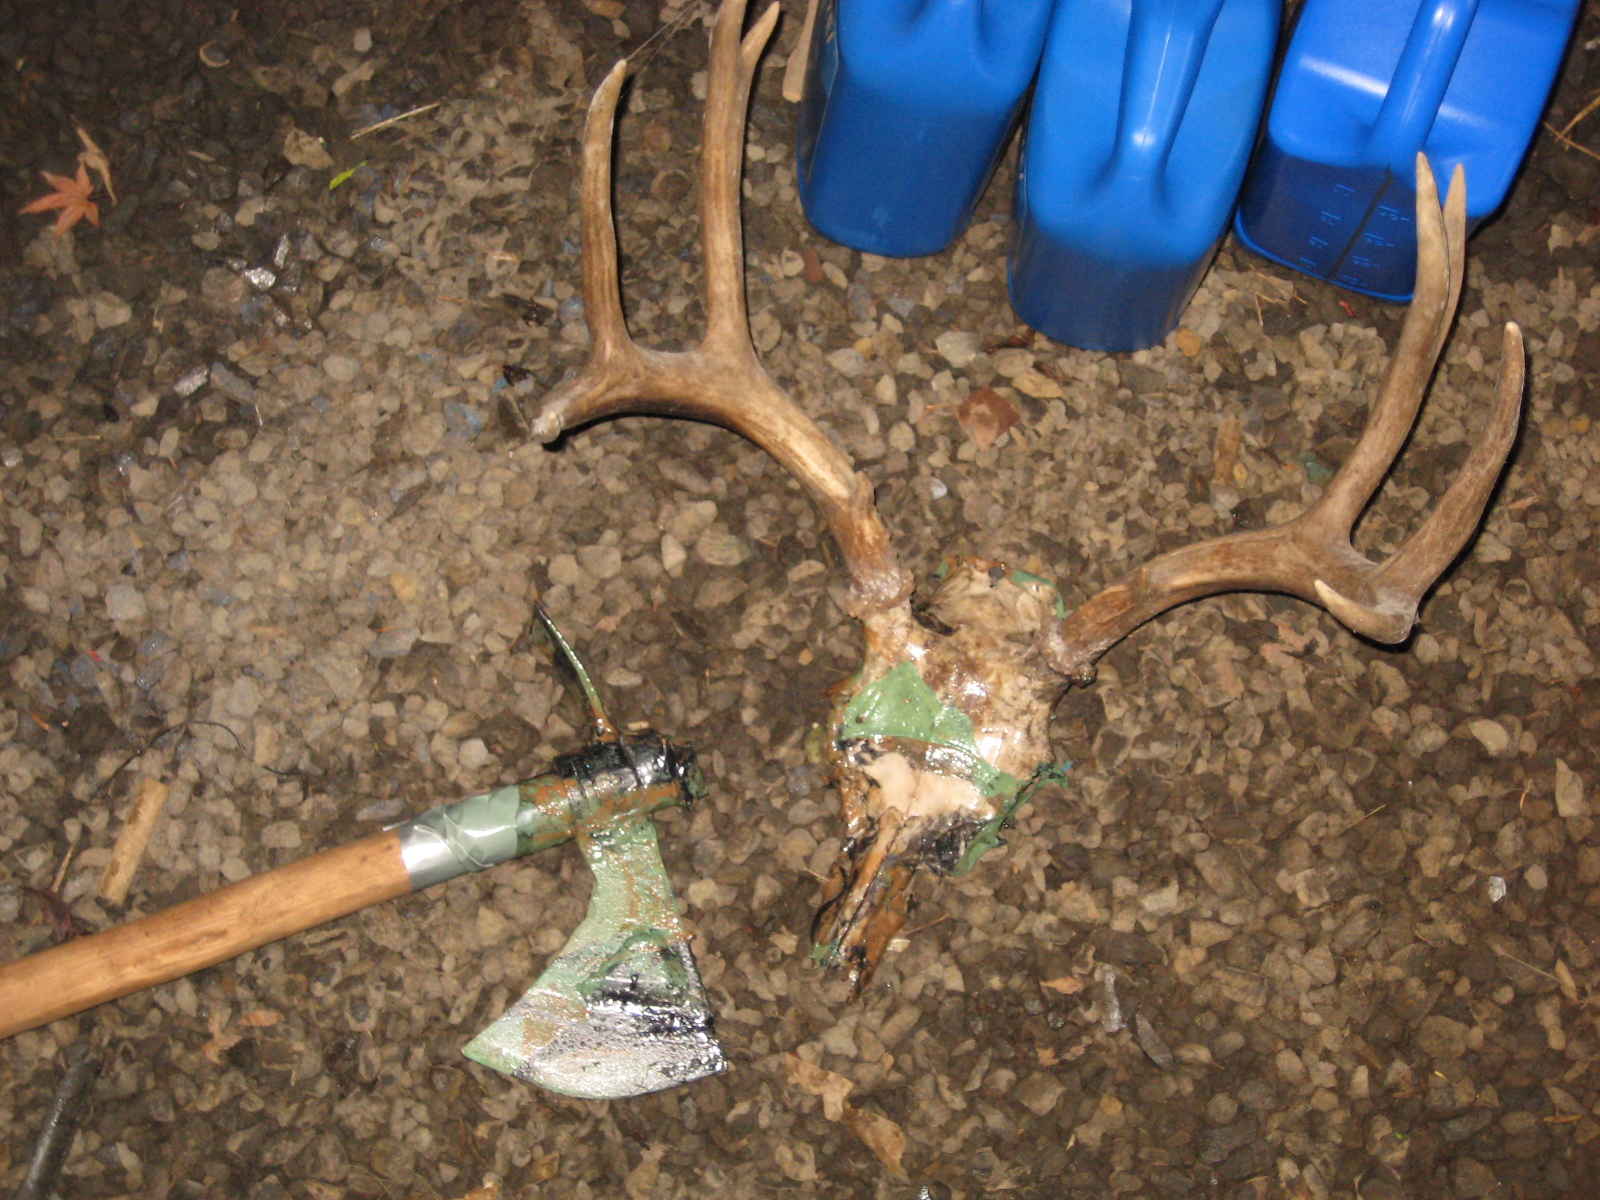
Basically, with a small tub of water, we sprayed 3 or 4 different colors of paint onto the surface of the water, then dipped.  30 seconds or less, and done.  And it turned out GREAT!


With an extra 30 seconds more of care and coloring, you could really do a nice, professional-looking job.


But for a rough tomahawk or old set of antlers? No way - lets keep it rough-n-real!

I even double-dipped the 'hawk and skull.  I completely (and quickly) submerged the 'hawk, removed it from the water, then dipped it right back in.  Not bad.

Still some paint left, I took an older set of antlers from a few years back, and double-dipped it, too.


I will do the antlers better next time - more care and less rush.  But this set isn't too bad.


Fun and easy to try, with great results.


Tomahawk!

The knife-making is great fun, but the REAL fun project has been a set of tomahawks.

We have several trapping tools that work better than a hatchet we carry while trapping - they are great for digging, chopping, etc. and are the #1 tool to grab.

Here's my main chopper, and it is sharp.  After a day of abuse digging frozen ground all it takes is 30 seconds with a file or grinder and it is ready to go.


If you have the time, however, take along the tommy.  Here is the best design we have so far - a longer blade with an adze backside (rounded and sharp, too).  Simple steel, shaped on the anvil, and welded to a piece of 1.5" pipe.  Easy Peasy.


Yeah, the welding is rough but it really adds to the character.  It was a great learning experience, too - we busted both the welds 3x before we got it tough and strong enough for our needs.

You'll also notice the angled 'plates' welded to the sides of the 'hawk blade - to help with splitting wood.  The 'hawk is plenty sharp, and these plates start splitting the grain well before your each the handle.


The balance is nice - forward heavy.  Easy to make a replacement handles as needed.

The best part?  The Adze!  Seriously - I want this on ALL of my tools, and even by itself.  It is that handy!  It shaves a branch flat quickly, and digs like a dream.  And it is fantastic for scrapping / fleshing hides!  Win-win-win...


The only issue we've found so far is that it rusts quickly - especially after scrapping a salted hide.  So... we did a quick-n-dirty Hydro-dip.  The rough welds and the rough paint go hand in hand.


Now the rusting is minimal, and only on the working surfaces which are easily (and frequently) cleaned by use.

Way fun project that keeps giving every day on the trap line.


Moving Past the Forge

Ok, its been a while and we've been busy.  We'll try to start posting projects and activities more timely.

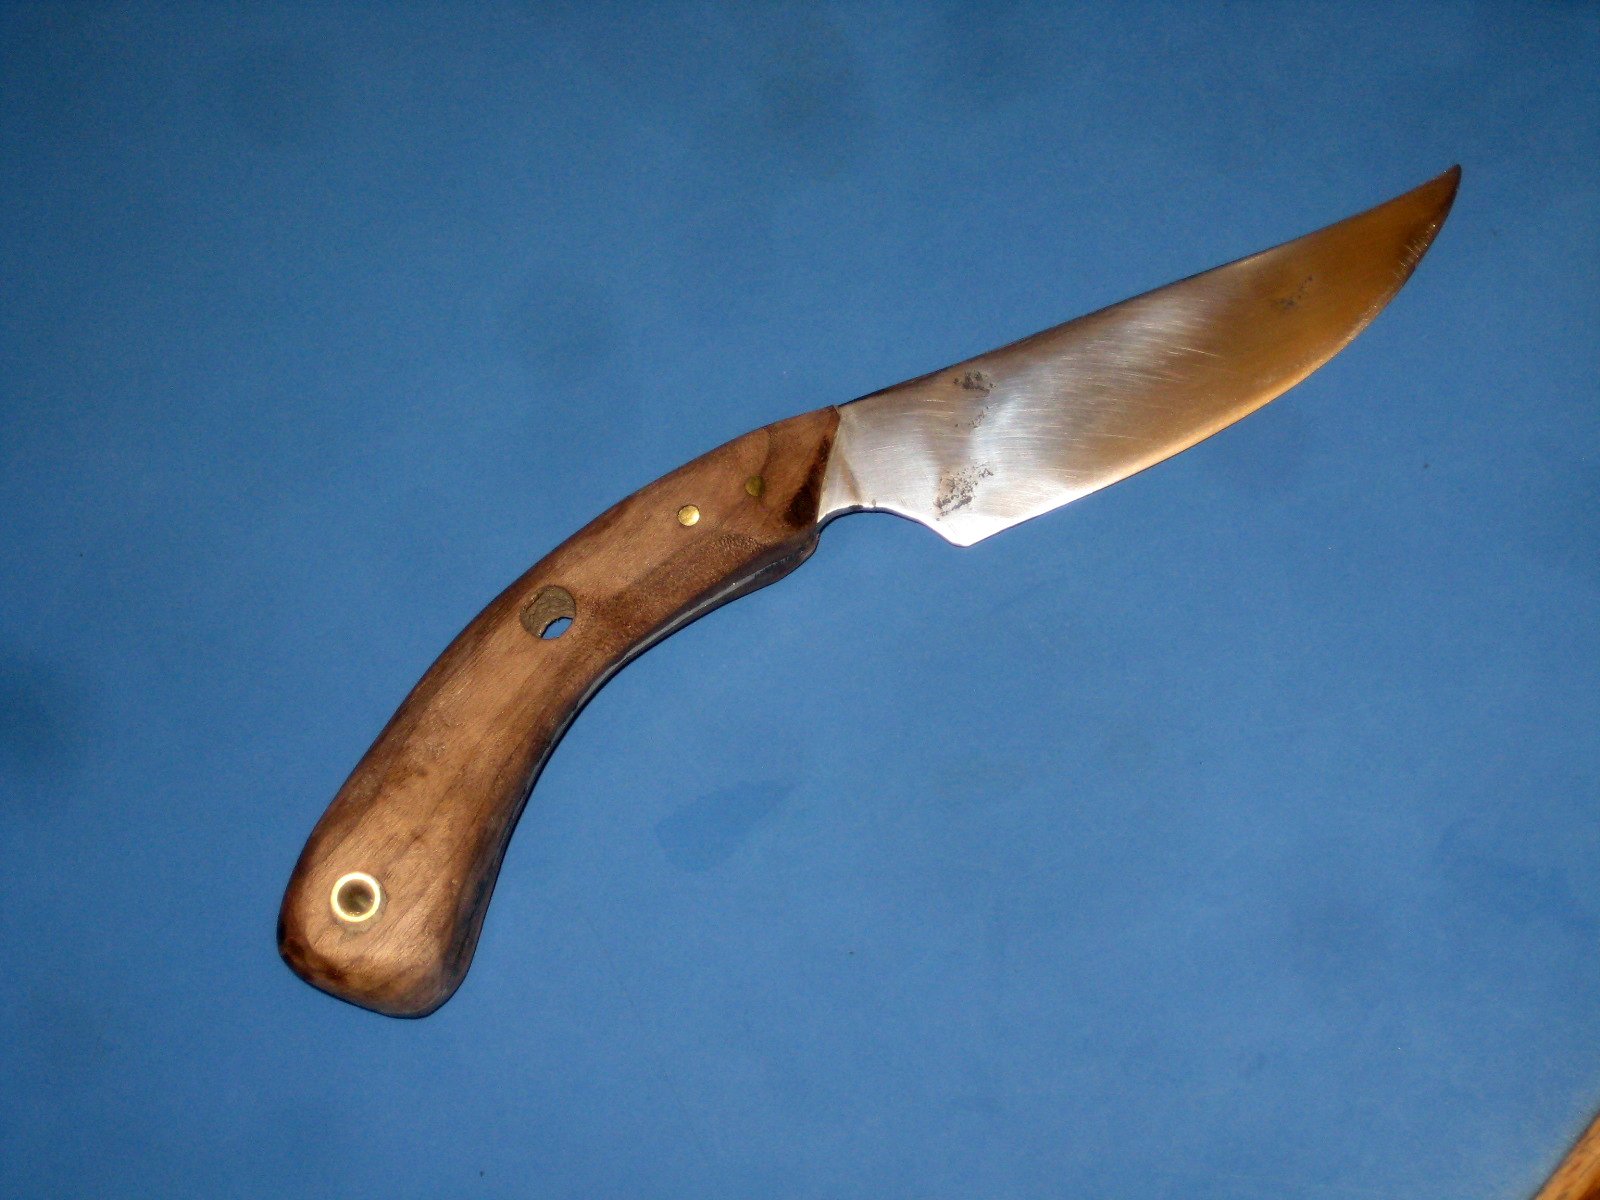
The coal forge has been busy and we've moved indoors during the wet winter months to improve the appearance and functionality of our knives.


Most everything is done with basic hand tools.  We did get a small drill press and sander, and that has made a huge difference.  With the sander, we've started doing more exotic handles of wood, bone, antler, and combinations of them.


One of the boys spent a day at a larger metal shop doing a job shadow.  Very informative and also helped assure him that he isn't too far off from what the 'pros' are doing.


our little forge also does great to give texture and different finishes on the blades.


My favorite are the two knives we made from old files we found in a remote trapping cabin in the Yukon Territories.  We cut birch wood for the handles, and a light oiling and finish made them very pretty.  And sharp!


Its a lot of fun with minimal tool requirements, and a GREAT way to keep young men busy in the winter months.

Saturday, April 13, 2013

Javalin Camera

Ok, last posting on cameras for a while.  With the faster video cameras we wanted to test it 'in action' but just not on a chicken.

One of the boys was practicing his javalin throw for track... so, we did a test run.


The camera worked great.  Having 60 fps made a BIG difference on the video - it was good to slow it down and very little was lost as the javalin flew.  Good news for when it is on a bird...  Here is a frame capture of the stick in-flight.  The camera is small enough to have no effect on the stick or the thrower.

Our setup was simple.  1000 mile tape, camera, and javalin.  Easy Peasy.

Adding Touchy-Feelly to a Glock

Seems like alot of our projects lately are gun-oriented.  I guess we do alot more shooting in the winter... but fishing and gardening are picking up, so we'll have more variety soon.  In the meantime, with all the camera/laser/smartphone projects we thought it would be cool to add a combined power supply, and get rid of so many buttons.  Why not add "touch sense" to the gun and have all the fun stuff turn on automatically?

So, here we go!

The foil strip acts as a capacitive sensor, and the microcontroller measures the change in voltage when a big, hairy human approaches.


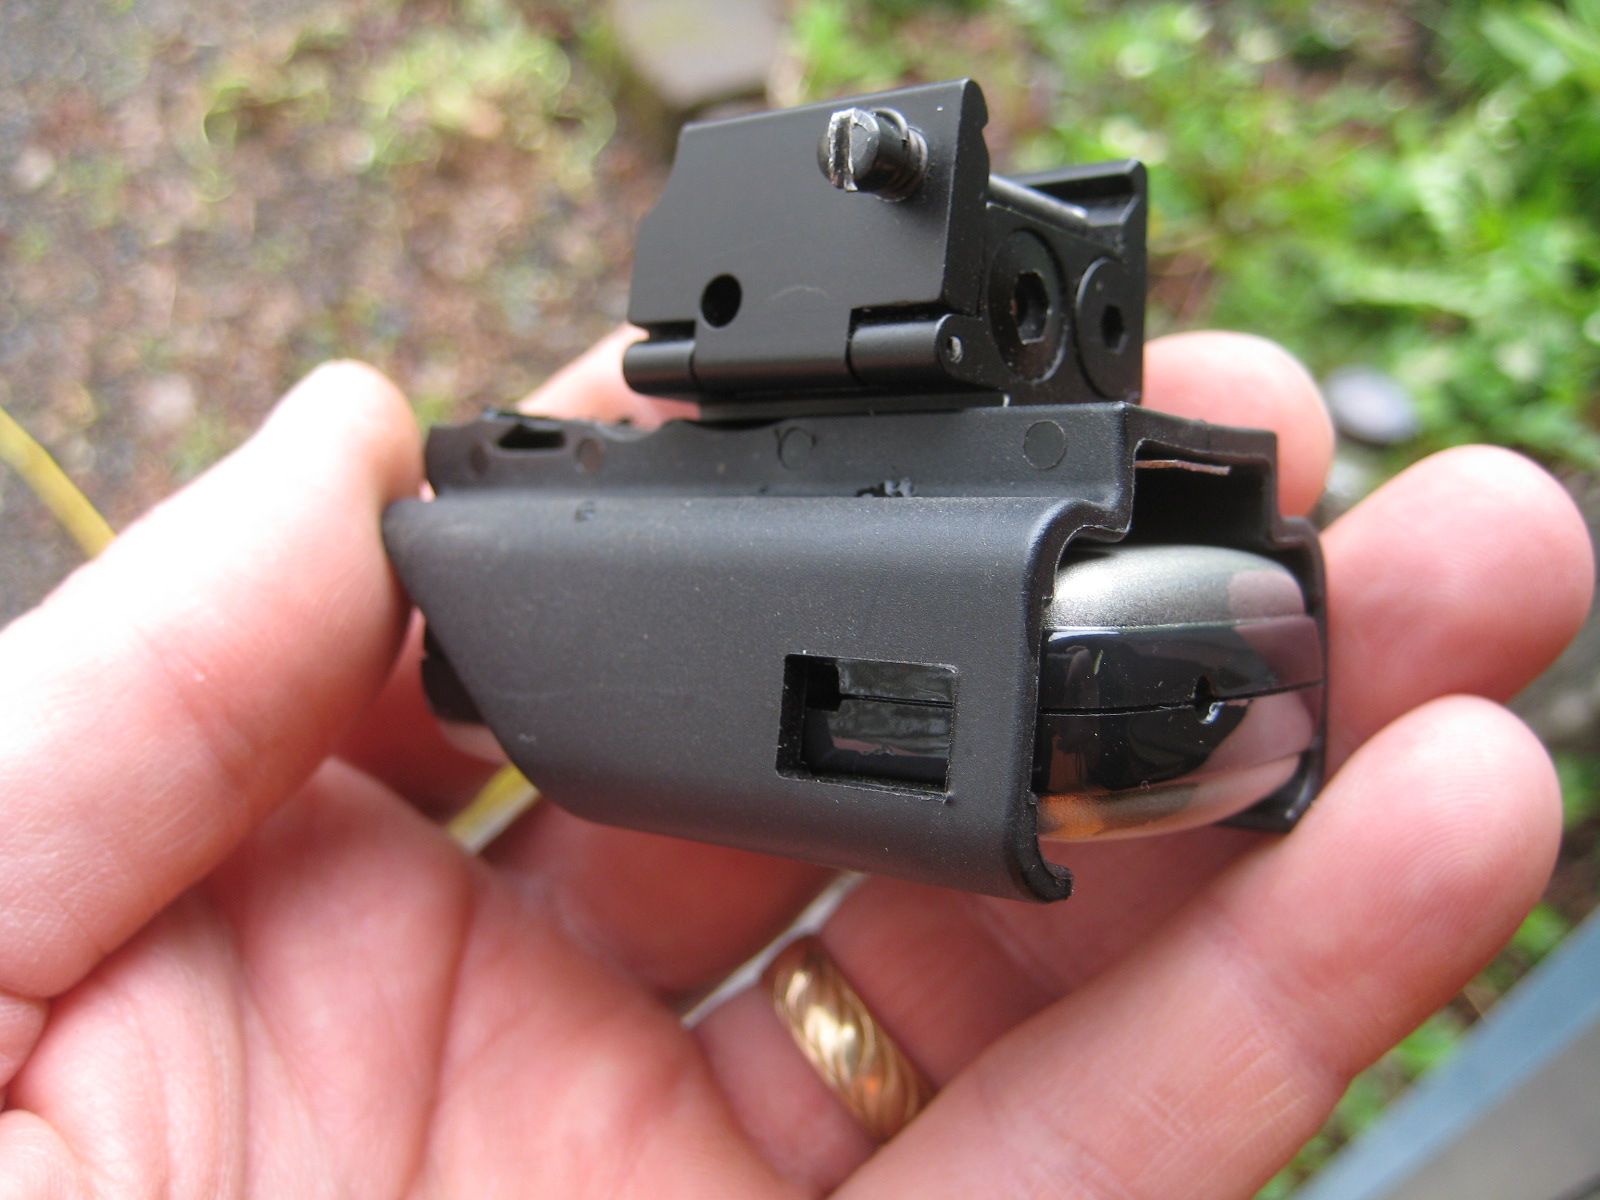
 With the foil along side of the magazine in the handle, the microcontroller can easily detect when the handgun is picked up.  Right now it just lights an LED, but soon, it will turn on a laser and start the video camera.  A very small wire is all that is needed for the sensor - not a big piece of foil.  Plus, the Glock has a nice 'compartment' in the handle big enough for a microcontroller, battery, etc.

This project came out of another project... We have been experimenting with different objects to detect when a person (or a cow) is near.  One way is using an electric fence - its already strung around the pasture, so we measured the sensor changes as a person or the cow approached.

It was fun to see just how sensitive we could make the device.  It would be cool to detect if a dog or coyote came into the pasture and play a recording to shoo it off.  Or, to keep the fence off unless the cow approached, then turn it on.

Always something to try or experiment with.

IDPA Shooting Camera

Some friends are doing more and more IDPA shooting - competitive handgun shooting in 'dynamic' environments.  Very fun to do and fun to watch.

So... of course, lets put on a camera!

Several options we are using - our favorite is the high-speed (60 fps) camera integrated with the laser.  The laser showes up VERY bright on the video (CCD sensors are very sensitive to the laser), and with the faster framerates, we can get some good analysis and followup after the shooting to take notes on what to do differently.

Glocks are our platform of choice - because of shooting preferences and with the integrated picatinny rail.  Here is a 3D print we did of a custom camera mount.  Very light and very strong.  The next prototypes are even better!

The faster camera is larger, but not much heavier.  We are building a new 3D print to remove the bulkiness of the camera and house the camera electronics.  Make it smaller and lighter.

This is a nice profile - with a larger holster it fits and draws very well.  Our next housing will be smaller and smoother for drawing.

Another project to stay tuned for.  We are looking into building an aluminum mount as well for more 'rigorous' shooting environments.  Here is a side-mount we have for carbines.


These cameras are much less expensive, lighter, and easier to use 'in action' than the GoPro cameras.  The GoPro are very nice, but alittle too nice for when we are shooting!  If you are interested drop us an email for more info at nwpodcast@gmail.com.  

Or stay tuned - we should have some video to upload soon...